Checkmate Patterns: Unterschied zwischen den Versionen
Matt (Diskussion | Beiträge) Keine Bearbeitungszusammenfassung |
Matt (Diskussion | Beiträge) Keine Bearbeitungszusammenfassung |
||
| (22 dazwischenliegende Versionen desselben Benutzers werden nicht angezeigt) | |||
| Zeile 1: | Zeile 1: | ||
This article describes some notable checkmate patterns. | This article describes some notable checkmate patterns. | ||
[[Datei:Checkmate Patterns.png|mini|500x500px|ohne]] | |||
== Back Rank Mate == | |||
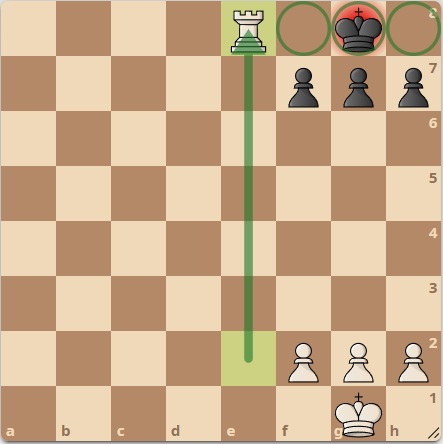
Back-Rank Mate is a checkmate delivered by a rook or queen along the back rank in which the king is unable to move because it is blocked by friendly pieces on the second rank. | |||
[[Datei:Back Rank Mate.png]] | |||
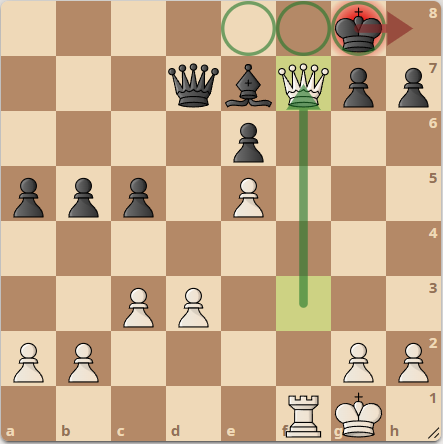
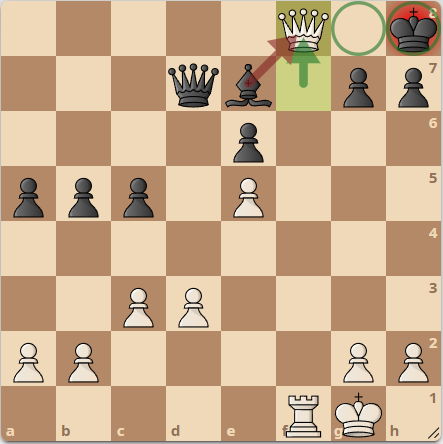
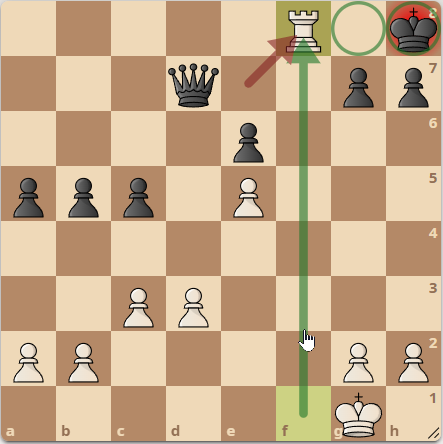
Checkmate in 3: | |||
# '''Qf7+ Kh8''' | |||
# '''Qf8+ Bxf8''' | |||
# '''Rxf8#''' | |||
[[Datei:Back-Rank Mate-Ex1-1.png]] [[Datei:Back-Rank Mate-Ex1-2.png]] [[Datei:Back-Rank Mate-Ex1-3.png]] | |||
== tbd Hook Mate == | |||
== tbd Anastasia's Mate == | |||
== tbd Blind Swine Mate == | |||
== tbd Smothered Mate == | |||
== Double Bishop Mate == | |||
Two bishops side by side control all fields around the king and therefore checkmate the king. | |||
[[Datei:Double_Bishop_Mate.png]] | |||
Checkmate in 1: Heinrich Ranneforth vs. Herbert Edward Dobell, 1903: | |||
# '''Bxe5#''' | |||
[[Datei:Double_Bishop_Mate_Example1.png]] | |||
Checkmate in 2: ''Victor Kahn vs Carl Hartlaub, 1916:'' | |||
# '''... Qxf3+''' | |||
# '''Bxf3 Bxf3#''' | |||
[[Datei:Double Bishop Mate Example2-1.png]] [[Datei:Double Bishop Mate Example2-2.png]] | |||
== Boden's Mate == | |||
Two attacking bishops with crossing diagonals deliver checkmate to a king obstructed by friendly pieces: | |||
[[Datei:Bodens Mate.png]] | |||
Checkmate in 2: ''R Schulder vs. Samuel Standidge Boden, 1853:'' | |||
# '''... Qxc3+''' | |||
# '''bxc3 Ba3#''' | |||
[[Datei:Bodens Mate-Ex1-1.png]] [[Datei:Bodens Mate-Ex1-2.png]] | |||
=== Fishing Pole Trap === | |||
Opponent has already castled. You have not yet castled, your rook is on h1/h8 and your pawn ist on h2/h7 | |||
Move your bishop to g5/g4 | |||
Fishing pole trap starts, when opponent moves the ah-pawn by one square to attack your bishop | |||
Move your h-pawn by two squares. | |||
If opponent takes bishop on g4/g5 you take the pawn | |||
== Pigs on the Seventh todo == | |||
Two rooks on the seventh rank (or second) are a major check mate threat. | |||
Defense: Try to prevent the opponent from bringing two rooks on your seventh (or second) rank. | |||
[[Kategorie:Chess]] | [[Kategorie:Chess]] | ||
Aktuelle Version vom 6. Juli 2025, 12:33 Uhr
This article describes some notable checkmate patterns.
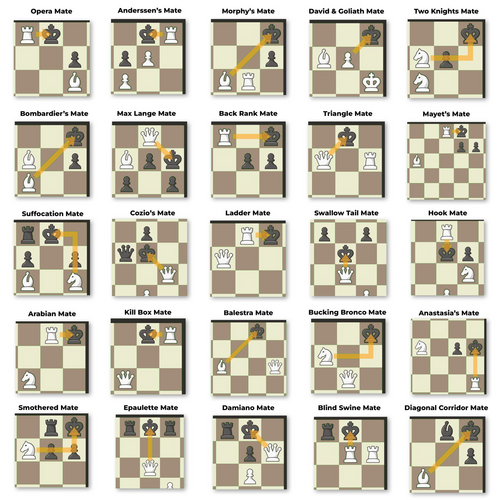
Back Rank Mate
Back-Rank Mate is a checkmate delivered by a rook or queen along the back rank in which the king is unable to move because it is blocked by friendly pieces on the second rank.
Checkmate in 3:
- Qf7+ Kh8
- Qf8+ Bxf8
- Rxf8#
tbd Hook Mate
tbd Anastasia's Mate
tbd Blind Swine Mate
tbd Smothered Mate
Double Bishop Mate
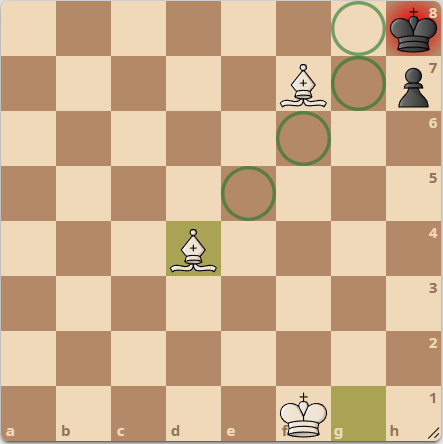
Two bishops side by side control all fields around the king and therefore checkmate the king.
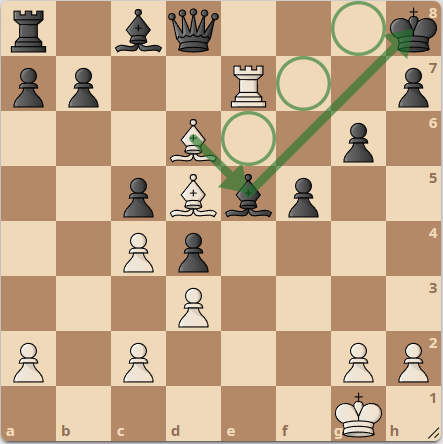
Checkmate in 1: Heinrich Ranneforth vs. Herbert Edward Dobell, 1903:
- Bxe5#
Checkmate in 2: Victor Kahn vs Carl Hartlaub, 1916:
- ... Qxf3+
- Bxf3 Bxf3#
Boden's Mate
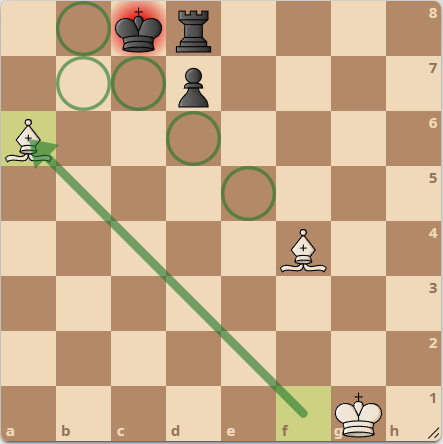
Two attacking bishops with crossing diagonals deliver checkmate to a king obstructed by friendly pieces:
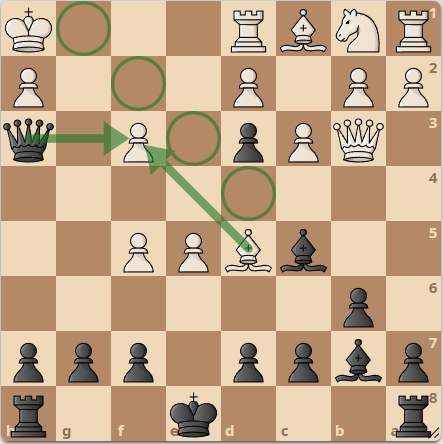
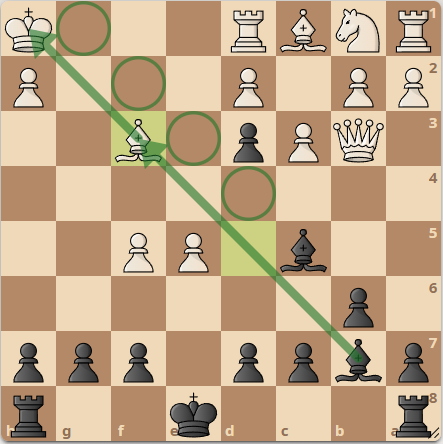
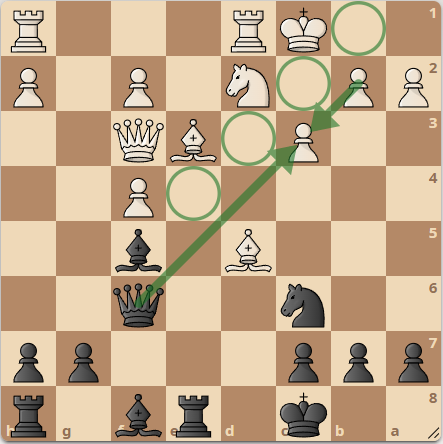
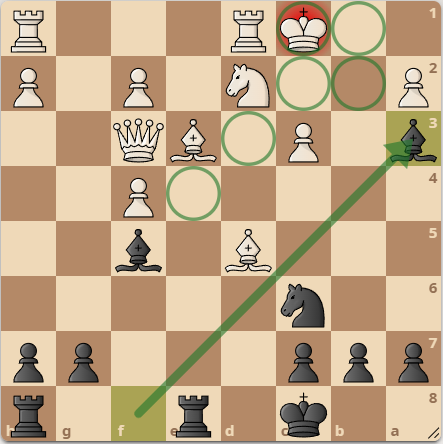
Checkmate in 2: R Schulder vs. Samuel Standidge Boden, 1853:
- ... Qxc3+
- bxc3 Ba3#
Fishing Pole Trap
Opponent has already castled. You have not yet castled, your rook is on h1/h8 and your pawn ist on h2/h7
Move your bishop to g5/g4
Fishing pole trap starts, when opponent moves the ah-pawn by one square to attack your bishop
Move your h-pawn by two squares.
If opponent takes bishop on g4/g5 you take the pawn
Pigs on the Seventh todo
Two rooks on the seventh rank (or second) are a major check mate threat.
Defense: Try to prevent the opponent from bringing two rooks on your seventh (or second) rank.
